


HOW TO CREATE PINS ON PINTEREST
If you are facing a problem creating a pin on Pinterest then you’re at the right place. Get ready to dive into the world of creativity and discover how to craft pins that stop the scroll and demand attention! Whether you’re a seasoned pinner or just starting out, this guide will take you on a journey to master the art of pin creation
WHY SHOULD YOU MAKE PINS ON PINTEREST
- Bring in traffic from Pinterest to your website. Although social media traffic has been declining, Pinterest is not a social media platform. It is an engine for visual discovery.
- Produce materials for the community.
- Increase Google and Pinterest search traffic by employing SEO strategies and keywords.
- Join the exciting, upbeat community that Pinterest has created.
- Raise awareness of your brand for your goods and services.
- Engage your Pinners with your DIY projects and ideas.
- Utilize lead magnets to collect email leads and generate leads.
HOW YOU WILL CREATE PINS ON PINTEREST.
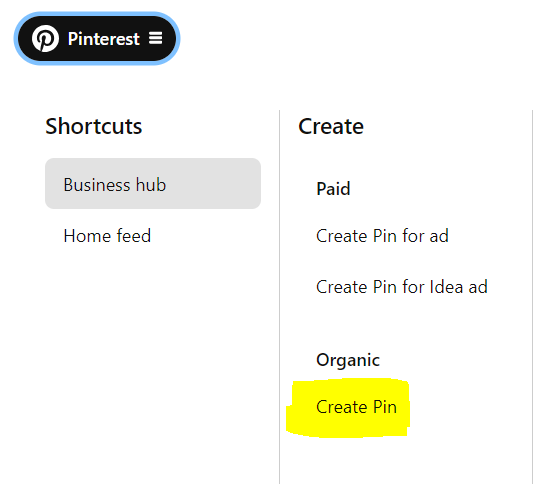
When you open your Pinterest account on the top left you can see written “PINTEREST” with 3 dots click on that and then you can see “CREATE A PIN” click on it after opening all this you can see a that Pinterest is asking you to “CHOOSE A FILE” you can choose your desired picture from your computer and upload it there.
EASY STEPS TO CREATE A PIN ON PINTEREST
STEPS:
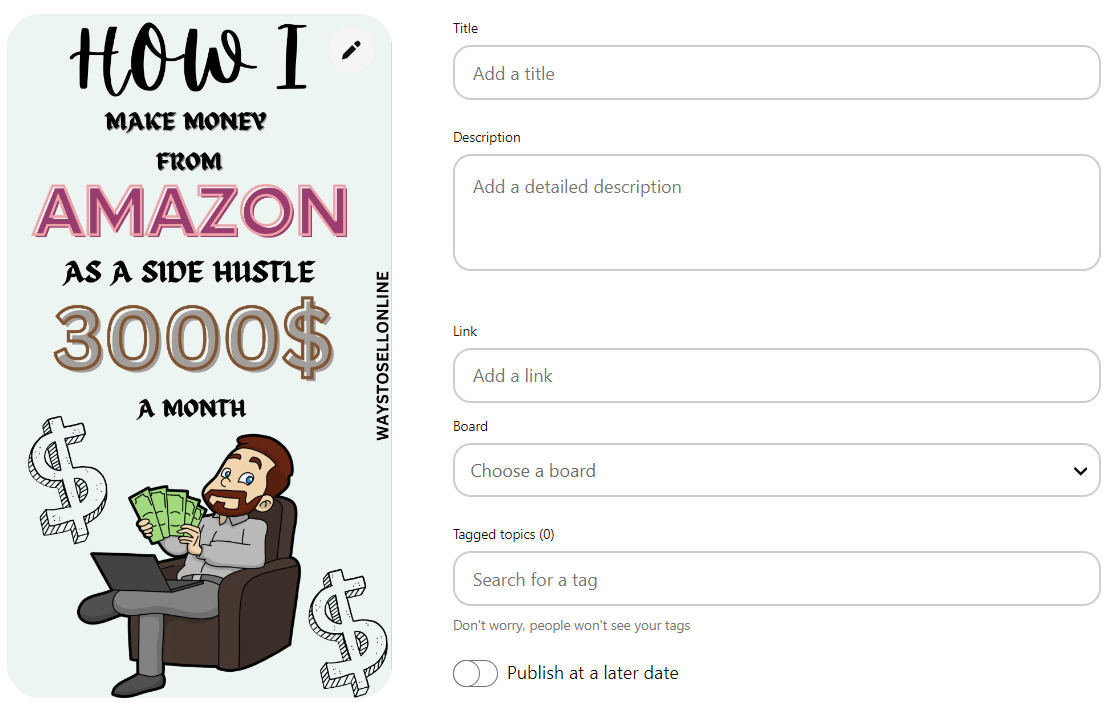
- Select your picture or graphic, and give your file a descriptive name to facilitate Pinterest search.
- Give the title of your pin (you have up to 100 characters).
- Write a clear, inspiring, and educational description in no more than 500 characters.
- Add a link to your website or blog
- Post immediately on Pinterest, or schedule for a later time!
- Use alt text to describe the visual elements of your pin. This will help those who are blind or visually impaired understand what is occurring in your pin, making it more accessible to them.
REMEMBER WHY YOU ARE MAKING PIN
If you are making pins to promote your business or to promote your website remember to make your pins eye catching like if someone see your pin they get attract to it and without any hesitation they should open it remember to put a an attractive keyword on your pin because if someone search for that particular keyword then he/she can see your pin and by clicking on your pin they can directly go to your website or YouTube channel where you have explained the full matter.

ADD CONTEXT TO YOUR CONTENT
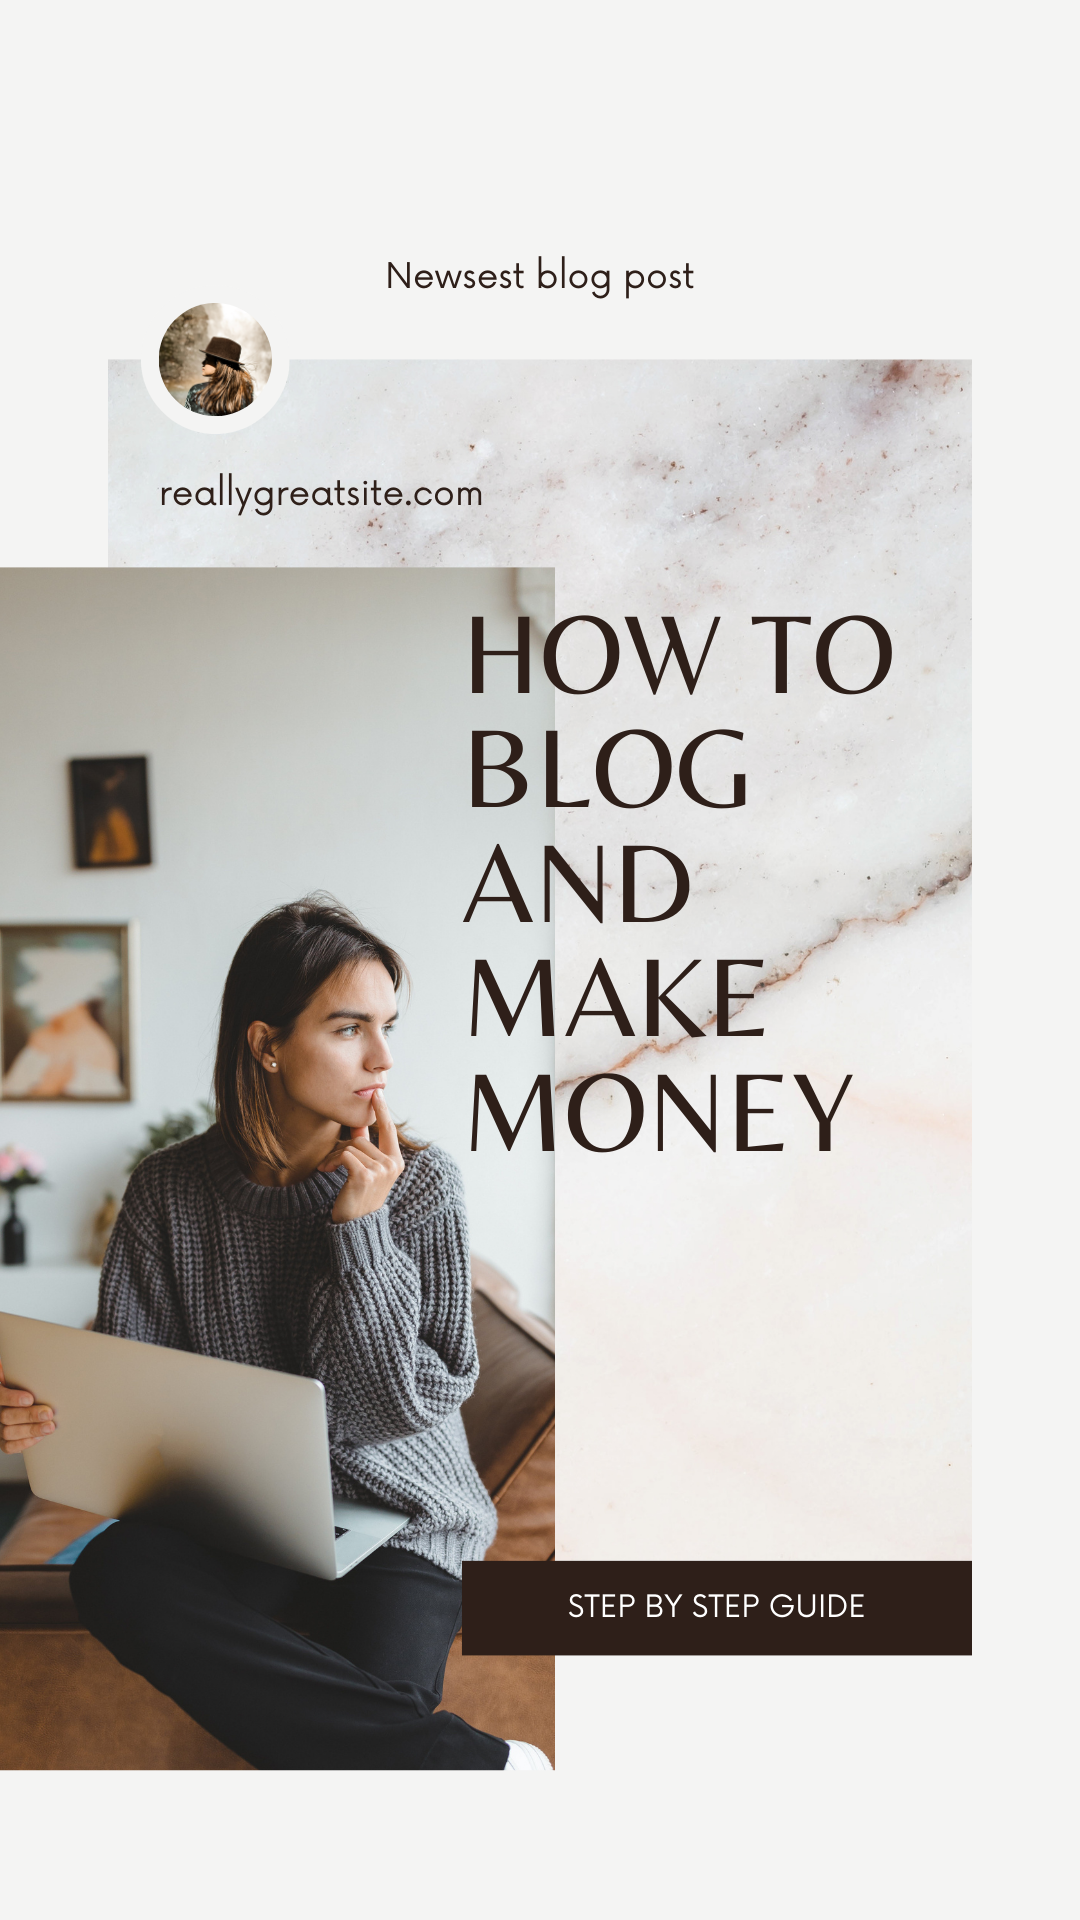
The photos you use for your Pinterest pins should support the narrative of the craft, recipe, or article you’re sharing. People don’t want a surprise when they come, thus the image serves as a breadcrumb leading to the main course.
Context can be added to your image by adding a text overlay. Make sure there is sufficient contrast and that the font is easy to read so that the text is readable. This is not the place for a forceful call to action; instead, consider how the material will inspire and educate readers as you add it.
Use high quality images
People stare straight at your graphic because 85% of Pinterest activity takes place on mobile devices, where users are up close and personal. Three to four photographs, depending on their size, will be displayed in the stream; if users tap to see more, only one image will be displayed.


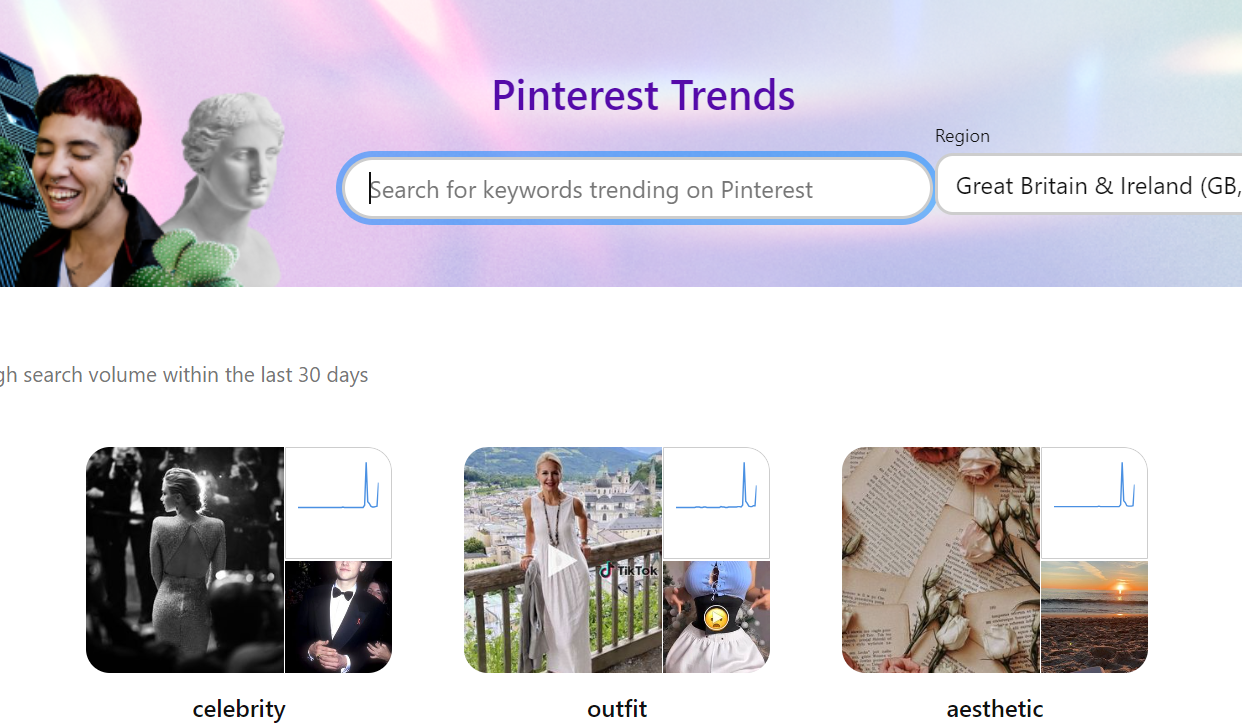
Make Use of Pinterest Trends to Produce Relevant Content
Use Pinterest Trends to inspire and add relevancy to your content preparation in order to keep it fresh. To determine the possible audience for a topic you might wish to post about, use the Pinterest trends tool. Enter a keyword to find the number of times it has been searched for over time. You can use that data to determine the main points of your article.
CONCLUSION
Mastering the art of pinning on Pinterest isn’t just about sharing images; it’s about creating a visual journey that captivates and inspires. With these proven strategies, you’re not just pinning, you’re winning! So, go ahead, unleash your creativity, spark curiosity, and watch your pins soar to new heights. Your Pinterest success story begins now – happy pinning
